Adicionando Certificado SSL Servidor Windows
6 de julho de 2020 | by administrador
1. Click the Download button in the pickup wizard to download your certificate files. Clicking the download button will produce a zip file that includes your Server Certificate, the Entrust chain/intermediate certificates(s) and the Entrust Root certificate. Extract the files from the zip file.
2. On the server, go to Start > Run > type MMC and hit enter.
3. Click File > Add Remove Snap-in.
4. Select Certificates and click Add.
5. Select Computer Account, click Next, and click Finish.
6. Click OK to close the window.
7. Expand Certificates on the left hand side of the console window.
8. Expand the Trusted Root Certification Authorities folder and click on the Certificates sub-folder.
9. Right click on the Certificates sub-folder under Trusted Root Certification Authorities and select All Tasks > Import.
10. In the import wizard, browse to the Root.crt file downloaded in step 1 and complete the wizard.
11. In the MMC console, expand the Intermediate Certification Authorities folder. Right click on the Certificates sub-folder and select All Tasks > Import.
12. In the import wizard, browse to the Intermediate.crt file downloaded in step 1 and complete the wizard to complete the certificate chain setup process. You should see your Entrust Intermediate certificates listed in the Intermediate Certification Authorities folder. You are now ready to install your signed server certificate.
Part 2 of 3: Installing the certificate on the server
1. Launch the Server Manager
– From within the Server Manager at the top right corner Select: Tools | Internet Information Services (IIS) Manager
2. From the left hand side under “Connections” select the workstations name
– Once the name is selected, look to the center of the screen and locate “Server Certificates”. Once selected double click.
3. Once in the “Server Certificates” to the upper right hand side under “Actions” select: Complete Certificate Request.
4. You will now need to provide the information listed in the screenshot below:
– File name containing the certification authority’s response: Provide the path to the Server certificate downloaded from Entrust.net, the default name of the Server certificate file name is “ServerCertificate.crt”
– PLEASE NOTE: You may need to change the file type view setting at the lower right corner of the browser window to be able to see the ServerCertificate.crt (or other files types besides .crt)
– Friendly Name: The friendly name is not linked to the certificate download from Entrust.net, it is used as an identifier after the certificate is installed. You should provide a unique Friendly Name so that you can easily identify what the certificate is used for.
– Select a certificate store for the new certificate: leave the selection set to Personal
Once you have provided the above information select: OK
The certificate is now installed
Part 3 of 3: Bind Certificate to website
1. From the left hand side of the IIS Manager, under Connections
– Expand the Server Name
– Now expand the Sites folder and select the site you wish to bind the certificate to
– From the right hand side under Actions, Select: Bindings…
2. From the Site Bindings menu Select: Add
3. From the Add Site Binding, change the settings listed below:
– Type: HTTPS
– SSL Certificate: Select the friendly name of the certificate you wish to bind to the site, you can verify that you have selected the correct certificate by clicking on View…
– Once you have configured the settings Select: OK
4. Now that the bindings has been updated you need to restart the web site
– From the right hand side under Actions | Manage Website
– Select: Restart
| Your SSL/TLS certificate should now be installed. |
The lists of server certificates in IIS and EMC contain only certificates that are assigned to the corresponding private key and generated along with the certificate signing request (CSR) used for activating a particular certificate. When the link between certificate and private key is broken for some reason, the certificate disappears.
In order to make the certificate reappear, you will need to force the link between the certificate and the private key using the following steps:
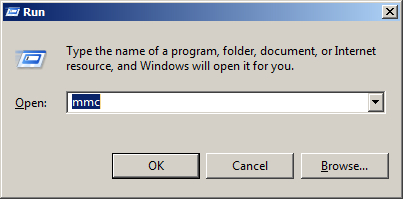
- Open Microsoft Management Console (MMC) on your server machine. Make sure that you are logged as administrator before proceeding. To open MMC, press Win+R combination, type in mmc and click OK.
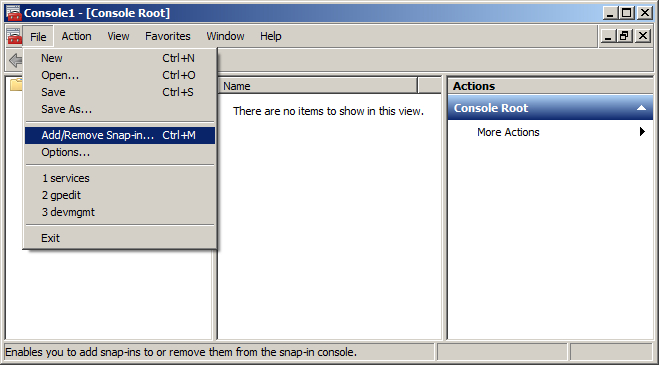
- In File menu, select Add/Remove Snap-in.
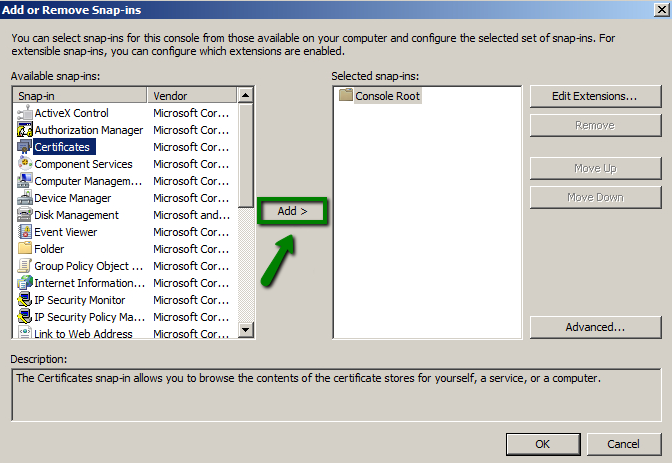
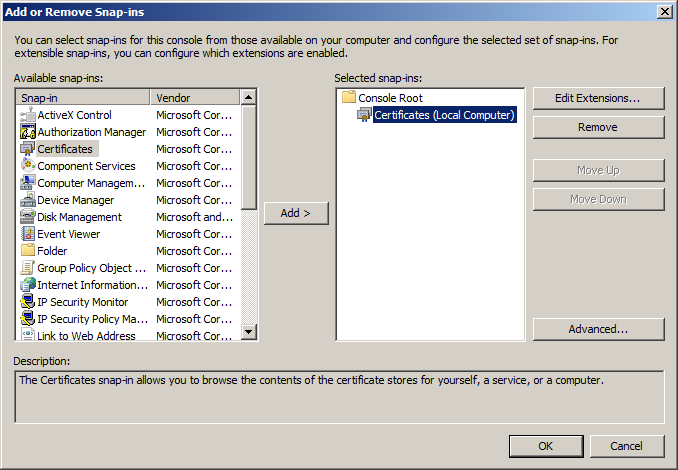
- In the Add or Remove Snap-ins dialogue window, select Certificates and click Add.
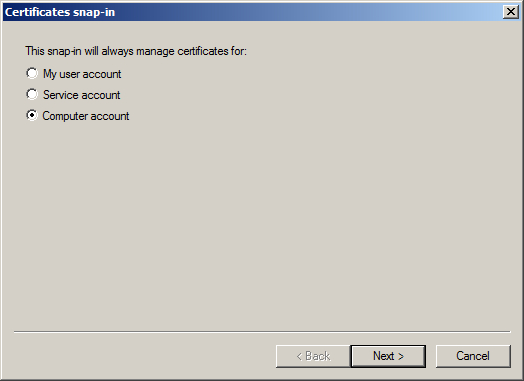
- Choose Computer account in the Certificates snap-in window, click Next.
- Tick Local computer in the Select computer box, then click Finish.
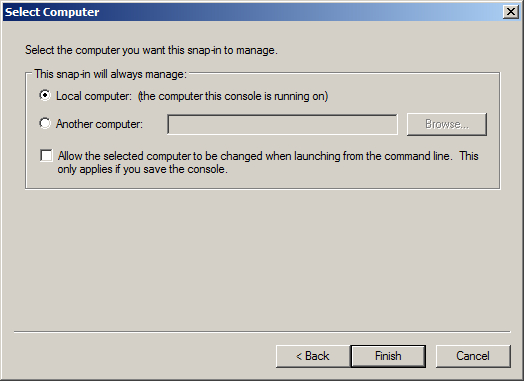
- The required snap-in is selected now. Click the OK button to proceed. The snap-in is now added to console.
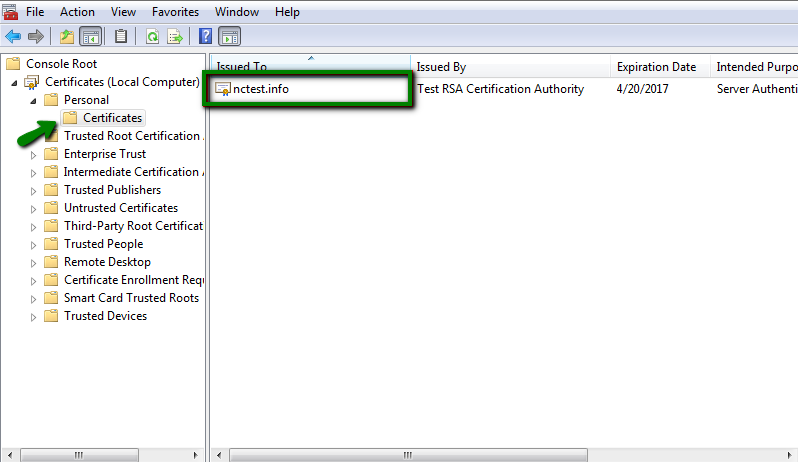
- Locate the certificate that was imported when completing certificate request. The certificate should be in Personal store. Note that the icon of the certificate next to the domain name does not have a key on it; that means that no private key is assigned to the certificate.
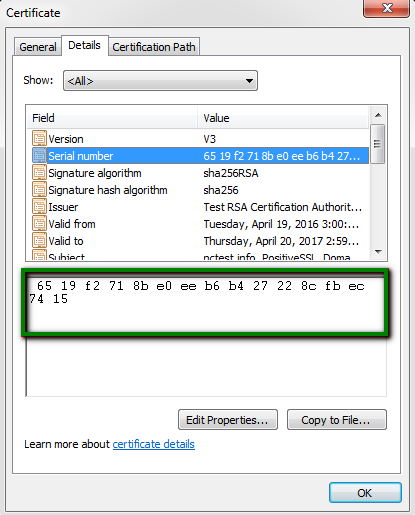
- Double-click the certificate and go to Details tab.
- In certificate details locate the Serial Number field, click on it and copy its value.
- Open Command Prompt, pressing Win+R and typing cmd, then click OK
- In the command prompt type: certutil -repairstore my Serial_number from step 9.Note: Make sure the serial number of your certificate does not contain any spaces. It should be a single string of symbols.
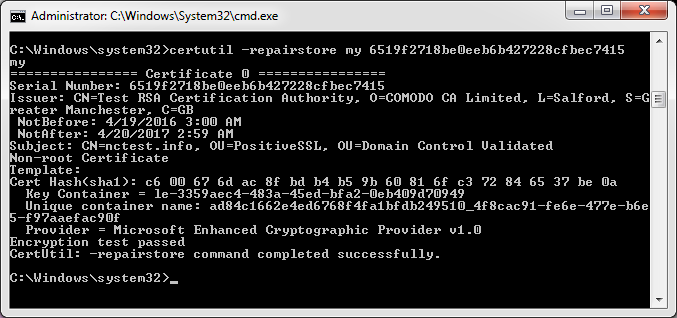 If you receive “CertUtil: -repairstore command FAILED: 0x80090010” error, this means that the certificate request was generated on another server, and the private key is absent on this one. You need to either transfer the key to your server via PFX file or create a new CSR code and reissue the certificate.
Important: There’s a known issue that after running the command an error “Please insert a smart card” may pop up. In such cases, most solutions suggest to disable the smart card on your server, you can find the corresponding guidelines (and even video-tutorials) over the Internet. If this doesn’t help, you can also use the following hot-fix provided by Microsoft. To apply this, you should be running Windows 8.1 or Windows Server 2012 R2. Additionally, you should have the following update installed: 2919355 Windows RT 8.1, Windows 8.1, and Windows Server 2012 R2 Update: April 2014. For more details, please contact Microsoft Support. - Refresh the list of certificates in Personal certificate store in your MMC. The certificate icon should have the key on it.

Additionally, if you double-click the certificate, you will see the message: “You have a private key that corresponds to this certificate.“
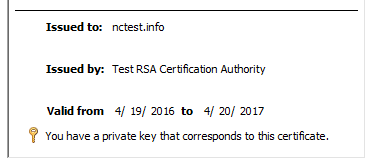
You can now refresh the list of server certificates in IIS Manager or Exchange Management Console to see the certificate there.
The same instructions may be used if the certificate was deleted from the server. If you delete a certificate, the corresponding private key remains on the server. This means that the certificate can be imported back to the server via MMC (you can download the certificate in your account, provided it was purchased with Namecheap, and take the steps from this article to import the certificate to your machine. The only difference is that the certificate should be imported into Personal store) and certutil command used to restore the link between the private key and the certificate.
